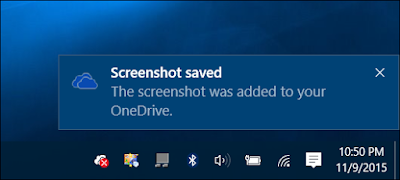
Capturing screenshots is a critical task that you can never skip. There are many instances you may need to take a screenshot. So it’s obvious that you always need an efficient way to take faster screenshots in Windows 10.
The
default method to take screenshots in Windows 10 is to use Print Screen key and
paste screenshots in paint where you can edit and save them manually. However,
this becomes quite a torture when it comes to capturing and saving hundreds of
screenshots daily (there are many people who do so, like researchers, bloggers
and tech personals).
That’s
why we’ve come up with this post, where we’ll guide you on how to take faster
screenshots in Windows 10. Let’s get started:
How to take faster screenshots in Windows 10
There
are three ways you can take faster screenshots in Windows 10:
Method 1. Using modifier keys
The
simplest way to capture screenshots in Windows 10 is doing so using Windows
key + Print Screen key combination. For this you’ve to follow some
simple steps mentioned below:
Step
1. Press Windows key + Print Screen
Step
2. Open Paint application
Step
3. Press Ctrl + V (paste) key combination. The
captured screenshot will appear on the empty paint screen, where you can edit and
save it manually.
These
captured screenshots will be saved at This PC > Pictures > Screenshots
location by default.
Note
There
is an issue with the above mentioned key combination. It captures the entire
display, including the secondary display if you have attached any. So you can use
the Alt + Print Screen combination. It only captures the currently
active screen. However, you’ll still have to paste the capture into paint and
save it manually.
Method
2: OneDrive or Dropbox
Yet
another efficient method to capture screenshots in Windows 10 is doing so using
cloud storage applications like Dropbox or Microsoft’s OneDrive
(which comes pre-installed on Windows 10). Using the apps, you can not only
capture screenshots swiftly, but also save them on the cloud and access them
later.
To
capture screenshots using OneDrive or Dropbox:
- You’ll have to use Alt + Print Screen key combination
However,
to do so you’ll need to enable screenshot capture on both the apps.
How
to enable Screenshot capture on OneDrive?
To
enable Screenshot capture on OneDrive, you’ll need to:
- Click the Show hidden icons button in the Notification Area in the Taskbar
- Right click OneDrive icon
- Click Settings
- Open the Auto Save tab and tick the Automatically save screenshots capture to OneDrive checkbox
How
to enable the Feature on Dropbox?
Here’s
how to enable Screenshot capture on Dropbox:
- Click the Show hidden icons button in the Notification Area in the Taskbar
- Right click the Dropbox icon
- Click the settings drop-down app that appears in the upper right corner of the window
- Click Preferences
- Open the Import tab
- Check the box beside Share screenshots using Dropbox option
Method 3. Using the Snipping tool
Well,
if you don’t want to use the above mentioned methods, you can go for this one
i.e you can capture faster screenshots in Windows 10 by using the built-in
Snipping tool. The utility allows you to capture precise screenshots of the
specific parts of your screen and easily save them on your PC.
To
use the program, you’ll need to:
- Click Start button and search snipping tool
- Click on the app to open it
If
you want to capture an open Window:
- Click the drop-down menu beside New
- Select Window Snip
- Click the Window you want to capture
Here’s
how you can capture a specific portion of the screen:
- Click the dropdown beside New
- Select Free-form Snip or Rectangular Snip
- Now, Click! Hold to start the capture! And drag until you’ve selected the entire area you want to capture
In the meantime, you can also customize Taskbar inWindows 10 if you want to make the interface better. Apart from the
built-in tools in Windows 10, you can use third-party screenshot capture
applications as well. There are plenty of them available in the market.
That’s it! Our guide on how to take faster screenshots
in Windows 10 ends here. So, if you want to capture faster screenshots on your
Windows 10 device. You can choose for any of the above mentioned methods.
They’ll definitely come handy!
Stay tuned for more updates!


No comments:
Post a Comment